You might know, that I dont like to trust cloud services and prefer to host my stuff at home. You might also know that I am a huge fan of open source technology and therefor want to press as much things into FOSS tools instead of buying a simple solution somewhere. Keeping this in mind it comes somhow logical that I also wan to try to connect everything that is somehow connected to my very own home-automation with no cloud setup. As my brand new photovoltaic system including the home charging station for my BEV does not offer an open api documentation I needed to go a new way and figure out how the app talks to the backend. Unfortunately all data goes directly through their cloud but this was more or less the best deal with full integration of PV, AC-converter, battery and charging station available.
Background Information: My solar power system is manufactured by Senec GmbH a subsidiary of the German EnBW corporation. For the new hardware Home-v4 there is literaly no documentation on the web how to steer / connect / query the system. Not even in some forums. At least I didn’t find it.
What did I do: At first I thought about the proxy feature of Postman but then realized that this feature is only available in the paid version. Then I was thinking of using a nginx installation and somehow issue certs there for the needed target urls but realized this is not a nice solution. Some more research brought me to the tool mitmproxy which actually does exactly what I was looking for.
It runs a man-in-the-middle proxy that has its own CA in the backend and issues certs for all URLs that are requested through it. It also has a built-in website that allows to install the CA cert directly in the browser (Chrome, Firefox) or on your mobile device. Debugging the API calls can be done in a simple CLI-UI.
preparation
install mitmproxy and check for your systems IP
apt install mitmproxy # besides ubuntu lts also available on many other common distributions
ip a
configure your mobile device
for iOS: open the wifi settings and while connected to your wifi select the small (i) icon for further configs.
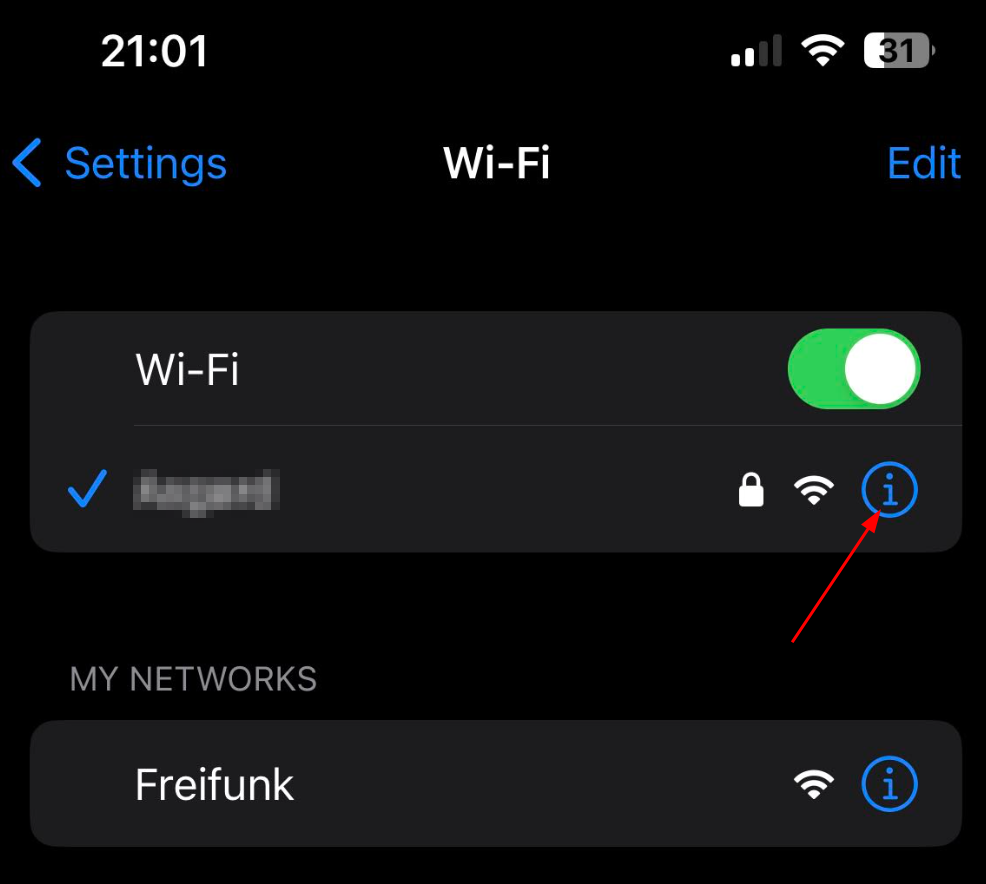
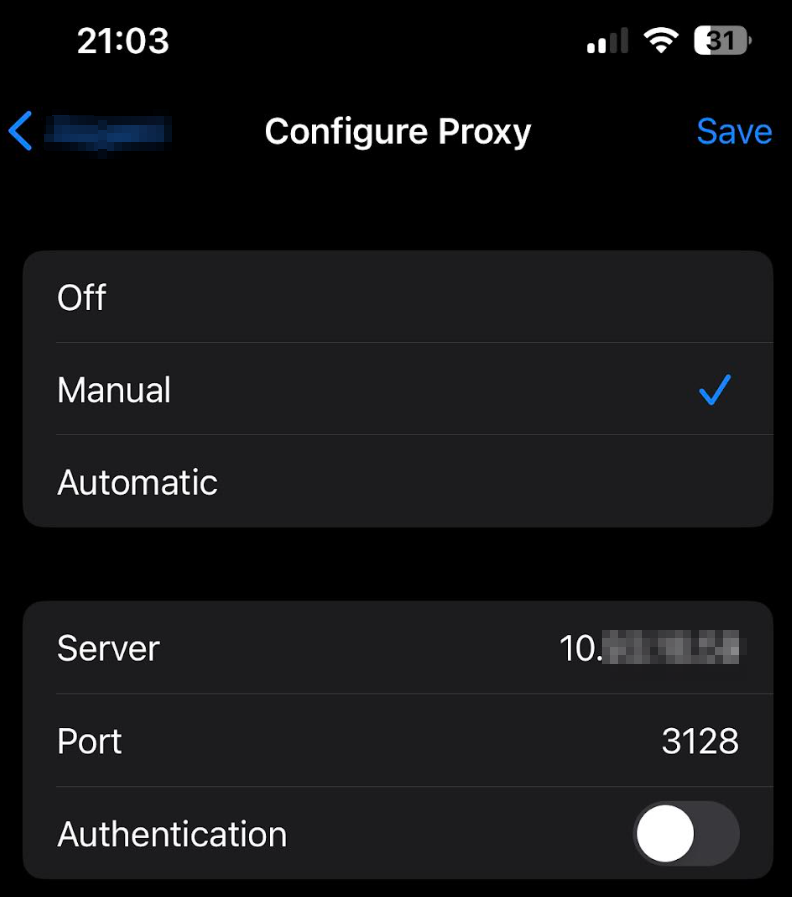
Scroll down to the bottom of the wifi config page and select ‘Configure Proxy’. Select “Manual” and enter the ip address of your system for Server and port 3128 as Port.
start mitmproxy on your machine
mitmproxy -p 3128
You might immediately see some connections poppig up but they will most likely fail as the provided certificates will not be signed with a known CA
configure your iPhone for use with the mitmproxy CA
Open safari and open the website: http://mitm.it.
You will now see the builtin-website, that supports you installing the CA to your system.
Go to iOS and click on get mitmproxy-ca-cert.pem. Make sure to follow the instructions. I didn’t and failed for quite some time.
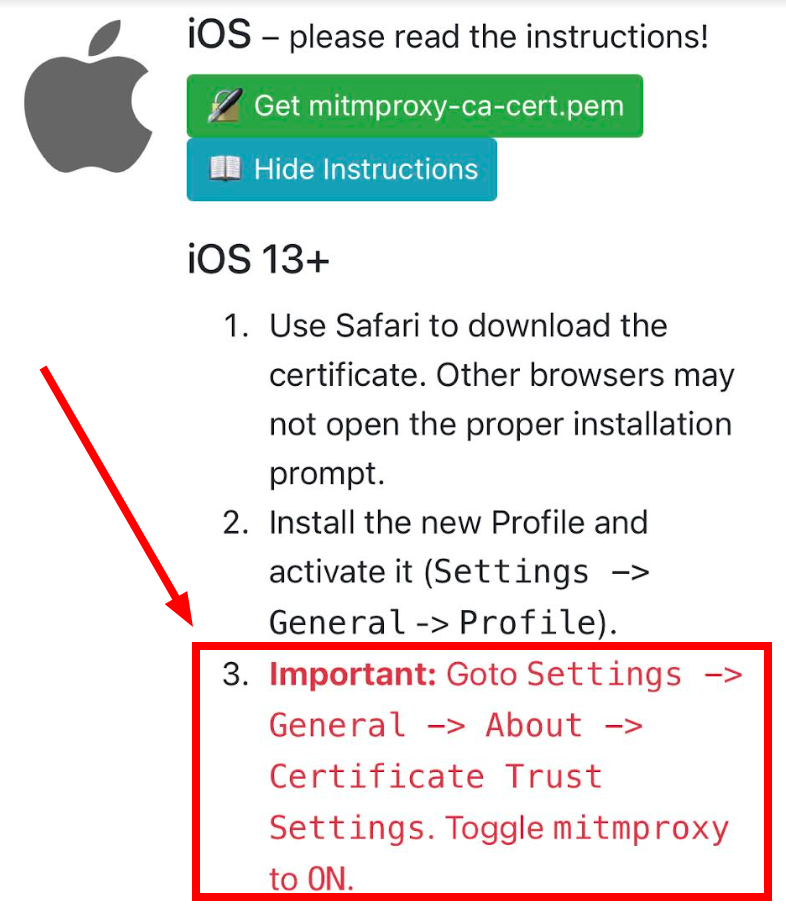
Small hint: when you are prompted for a PIN or pass, this is your iPhone unlock secret.
Use the information to gather the details
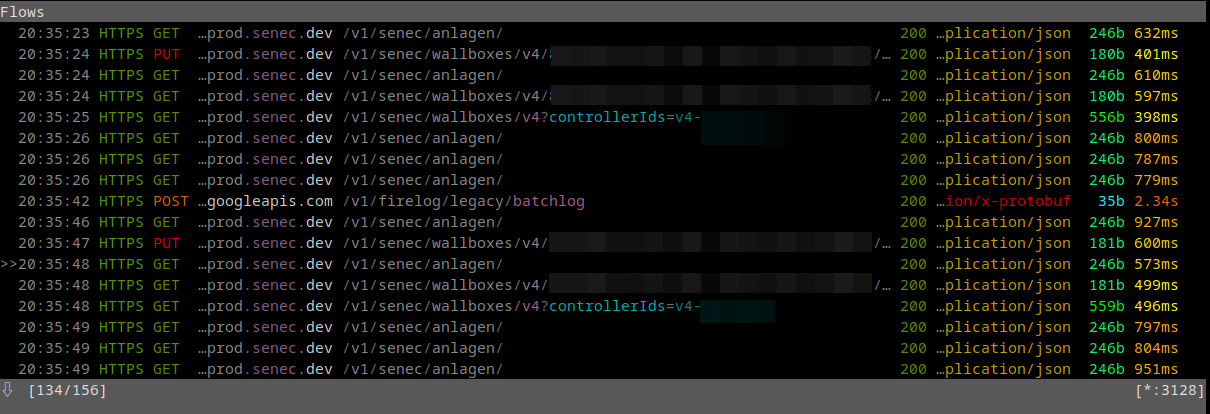
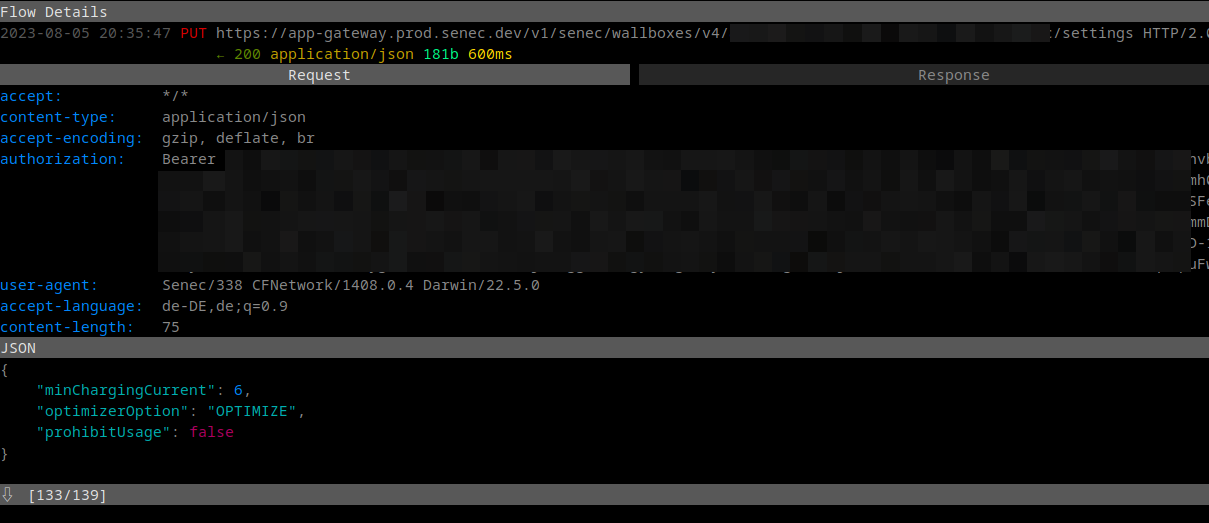
if you now switch back to the mitmproxy ui you will see connections showing up. You can check them by selecting it and you can see all the neat details that you want to know. What payload was sent, what is the response, what is the api endpoint… Pretty much everything you need to be able to talk to the target with curl or any script you’d like.
Screenshots:
Cleanup your iPhone again
As I am sometimes a bit paranoid and dont want to have additional CAs installed on my phone that might be used to intercept my connections. Make sure to remove that CA after you did everything you wanted to do with mitmproxy from your phone. You can easily reinstall it again, when you use mitmproxy the next time.